clang比gcc编译效率更高,更多详情自行了解。
还要配置cmake环境的看这里 点击跳转
不废话,开始配置。
前提:安装好vscode(我还是想废话一下)
需要下载两个东西,链接已附,版本会随时间更新,这用的都是用当前的最新版
1-LLVM http://releases.llvm.org/download.html#11.0.0
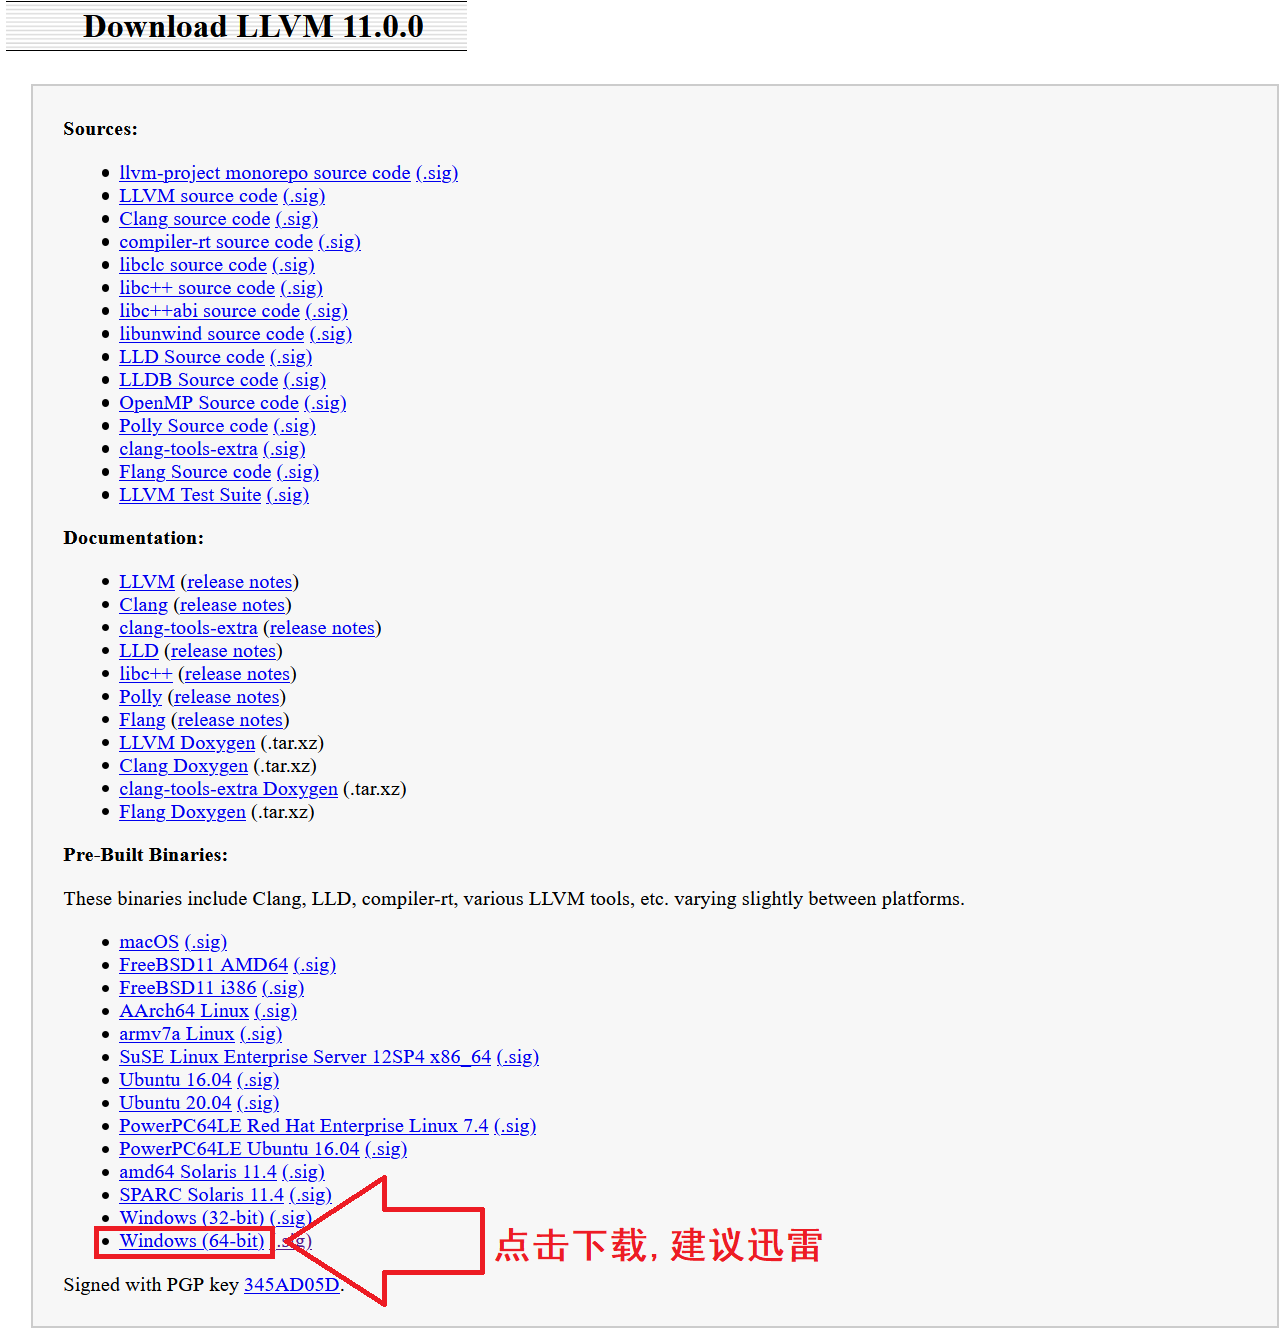
2-MINGW64 http://sourceforge.net/projects/mingw-w64/files/

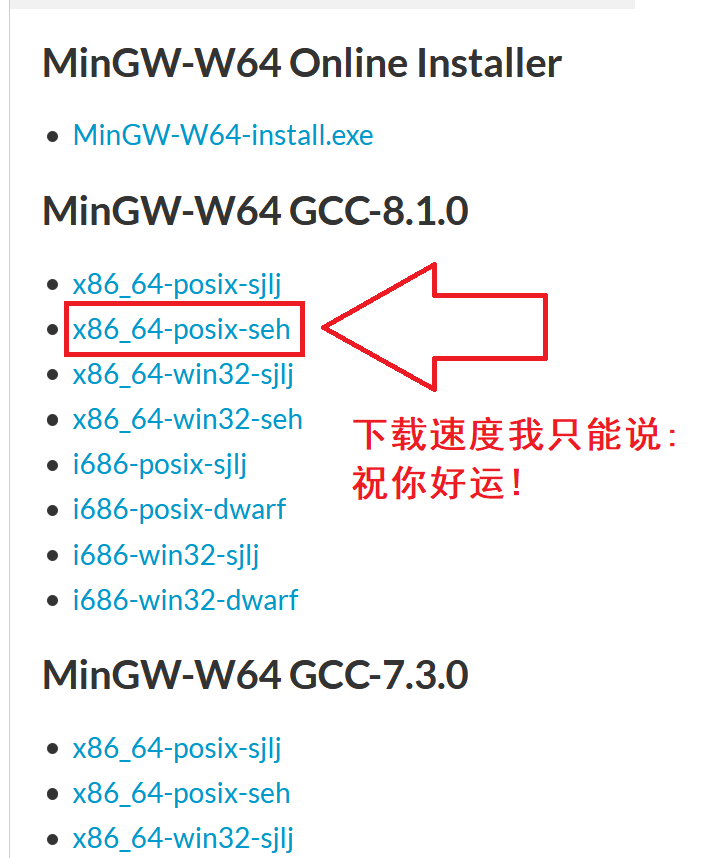
两个都下载好后得到一个安装包一个压缩包
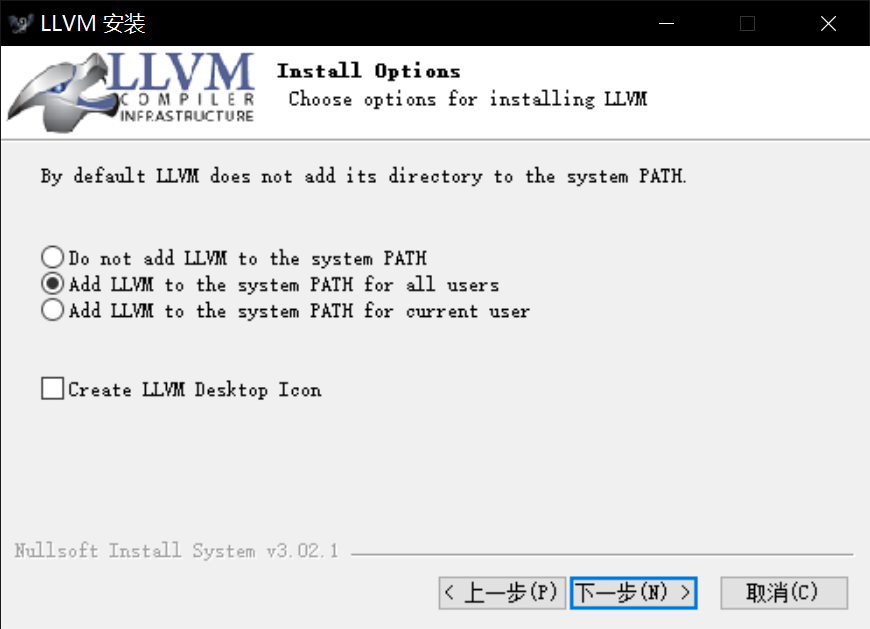
LLVM双击安装,除了下图这选Add LLVM to the system PATH for all users(不然你就自己去配置环境变量)
其他无脑下一步,路径也别改,实在要改的话后面的配置路径自行修改。
默认路径就是C:\Program Files\LLVM,安装完2G多一点
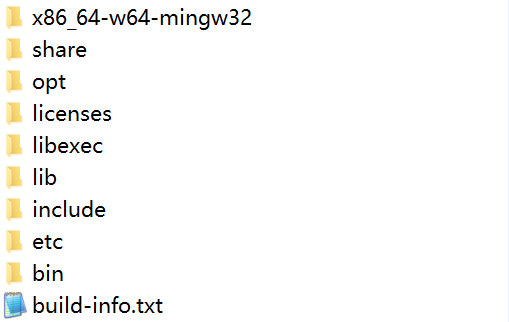
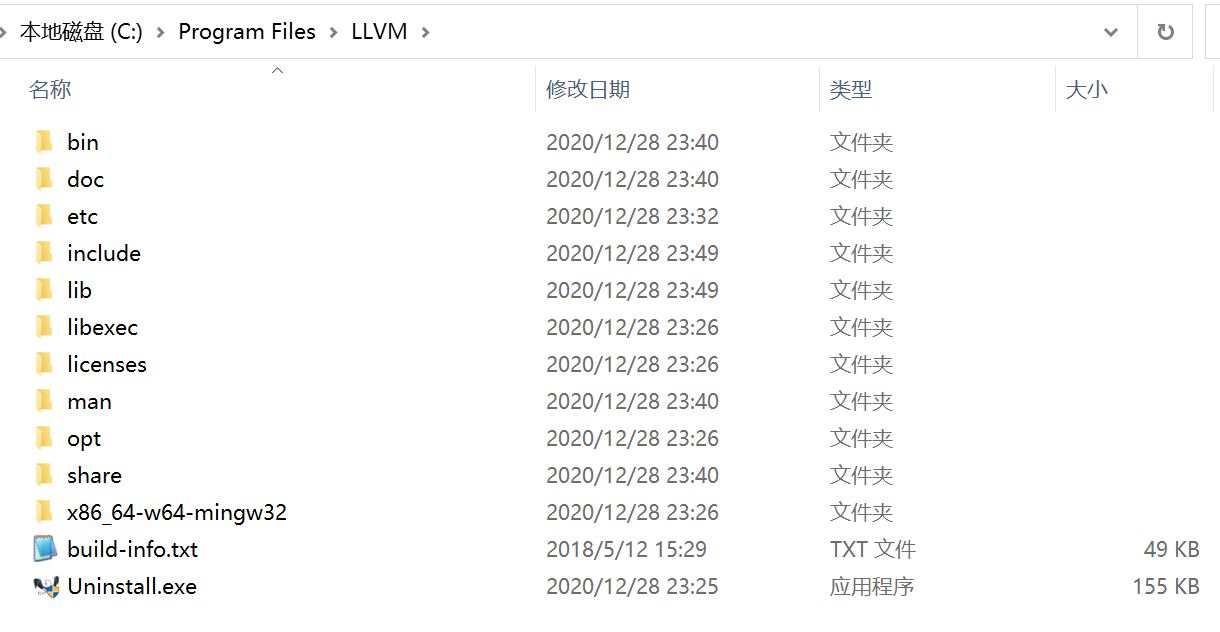
如果要添加头文件或库文件
头文件放到这两个路径 C:\Program Files\LLVM\include 和 C:\Program Files\LLVM\x86_64-w64-mingw32\include
库文件放到这两个路径 C:\Program Files\LLVM\lib 和 C:\Program Files\LLVM\x86_64-w64-mingw32\lib
至此系统环境已经配置完毕,现在把视线转移到vscode
首先创建一个文件夹作为你编写C++的工作目录,路径不能有中文,一个中文字符也不能有,否则会翻车!!!
进去这个文件夹再创建一个文件夹名字为".vscode"(小数点别漏了)
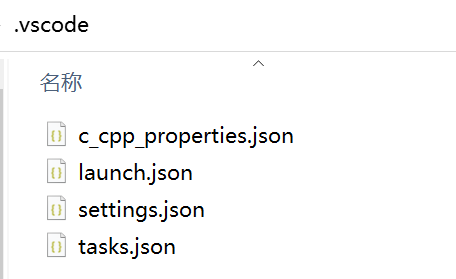
打开.vscode文件夹,创建下面这四个json文件
c_cpp_properties.json 工作区的配置文件
settings.json 工作区的配置文件
launch.json 调试的配置文件
tasks.json 调试的配置文件
基本上每个配置文件的值都有说明注释,自己看
然后返回上一级目录,在空白地方右键,通过Code打开(如果你安装vscode的时候没添加到右键你就自己打开vscode然后选择工作区)
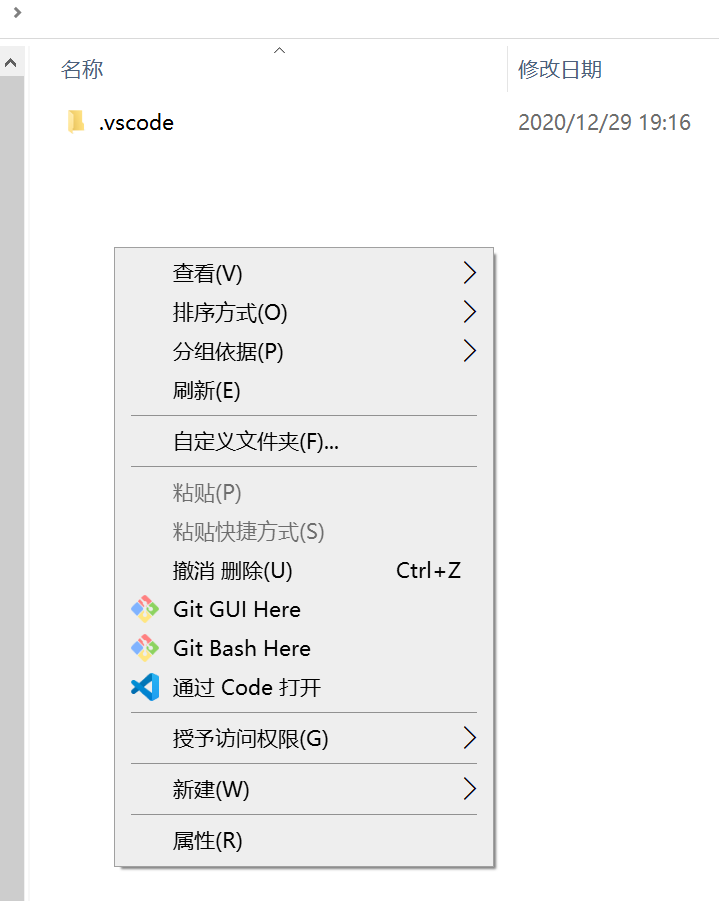
打开vscode后正常情况就这样
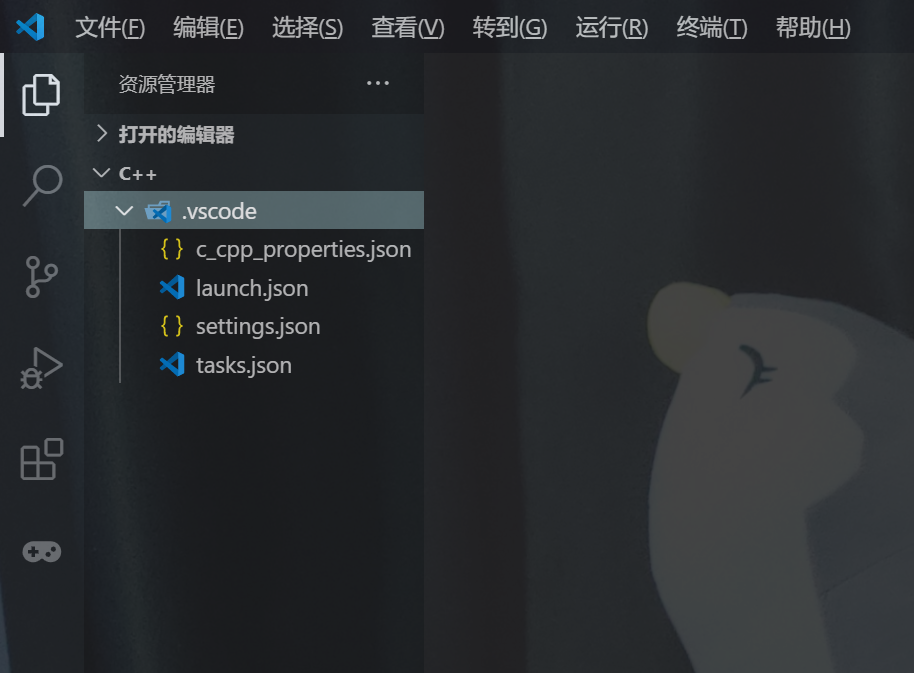
然后把下面的东西复制粘贴到对应json文件
//c_cpp_properties.json
{
    "configurations": [
        {
            "name": "g++",
            "intelliSenseMode": "clang-x64",
            "compilerPath": "C:/Program Files/LLVM/bin/g++.exe",
            "includePath": [
                "${workspaceFolder}"
            ],
            "defines": [],
            "browse": {
                "path": [
                    "${workspaceFolder}"
                ],
                "limitSymbolsToIncludedHeaders": true,
                "databaseFilename": ""
            },
            "cStandard": "c11",
            "cppStandard": "c++17"
        }
    ],
    "version": 4
}
// launch.json
{
// 使用 IntelliSense 了解相关属性。
// 悬停以查看现有属性的描述。
// 欲了解更多信息,请访问: http://go.microsoft.com/fwlink/?linkid=830387
"version": "0.2.0",
"configurations": [
{
"name": "(gdb) Launch", // 配置名称,将会在启动配置的下拉菜单中显示
"type": "cppdbg", // 配置类型,这里只能为cppdbg
"request": "launch", // 请求配置类型,可以为launch(启动)或attach(附加)
"program": "${file}.exe", // 将要进行调试的程序的路径
"args": [], // 程序调试时传递给程序的命令行参数,一般设为空即可
"stopAtEntry": false, // 设为true时程序将暂停在程序入口处,我一般设置为true
"cwd": "${workspaceRoot}", // 调试程序时的工作目录
"targetArchitecture": "x86_64", // 生成目标架构,一般为x86或x64,可以为x86, arm, arm64, mips, x64, amd64, x86_64
"externalConsole": true,
"internalConsoleOptions": "neverOpen",
"MIMode": "gdb", //调试器名称
"miDebuggerPath": "C:\\Program Files\\LLVM\\bin\\gdb.exe", //调试器路径
"preLaunchTask": "clang++", //和tasks.json的label值要相同
"setupCommands": [
{
"description": "为 gdb 启用整齐打印",
"text": "-enable-pretty-printing",
"ignoreFailures": true
}
]
}
]
}// settings.json
{
"files.defaultLanguage": "cpp", // ctrl+N新建文件后默认的语言
"editor.formatOnType": true, // 输入时就进行格式化,默认触发字符较少,分号可以触发
"editor.snippetSuggestions": "top", // snippets代码优先显示补全
"code-runner.runInTerminal": true, // 设置成false会在“输出”中输出,无法输入
"code-runner.executorMap": {
"c": "cd $dir && clang $fileName -o $fileNameWithoutExt.exe -Wall -g -Og -static-libgcc -fcolor-diagnostics -lws2_32 -liphlpapi -lgdi32 -w --target=x86_64-w64-mingw && $dir$fileNameWithoutExt",
"cpp": "cd $dir && clang++ $fileName -o $fileNameWithoutExt.exe -Wall -g -Og -static-libgcc -fcolor-diagnostics -lws2_32 -liphlpapi -lgdi32 -w --target=x86_64-w64-mingw && $dir$fileNameWithoutExt"
}, // 设置code runner的命令行,点击右上角的运行跑的就是这些代码,里面的参数啥意思看tasks.json
"code-runner.saveFileBeforeRun": true, // run code前保存
"code-runner.preserveFocus": true, // 若为false,run code后光标会聚焦到终端上。如果需要频繁输入数据可设为false
"code-runner.clearPreviousOutput": true, // 每次run code前清空属于code runner的终端消息
"C_Cpp.clang_format_sortIncludes": false, // 格式化时调整include的顺序(按字母排序),这个别开,不信以后遇到问题你就会来关了
"C_Cpp.intelliSenseEngine": "Default", // 可以为Default或Tag Parser,后者较老,功能较简单。具体差别参考cpptools扩展文档
"C_Cpp.errorSquiggles": "Disabled", // 因为有clang的lint,所以关掉
"C_Cpp.autocomplete": "Disabled", // 因为有clang的补全,所以关掉
"clang.completion.enable": true,
"C_Cpp.dimInactiveRegions": false,
"clang.cflags": [ // 控制c语言静态检测的参数
"--target=x86_64-w64-mingw",
"-std=c11",
"-Wall"
],
"clang.cxxflags": [ // 控制c++静态检测时的参数
"--target=x86_64-w64-mingw",
"-std=c++17",
"-Wall"
],
"files.associations": {
"ostream": "cpp",
"iostream": "cpp",
"array": "cpp",
"atomic": "cpp",
"*.tcc": "cpp",
"cctype": "cpp",
"clocale": "cpp",
"cmath": "cpp",
"cstdarg": "cpp",
"cstddef": "cpp",
"cstdint": "cpp",
"cstdio": "cpp",
"cstdlib": "cpp",
"cstring": "cpp",
"cwchar": "cpp",
"cwctype": "cpp",
"deque": "cpp",
"unordered_map": "cpp",
"vector": "cpp",
"exception": "cpp",
"algorithm": "cpp",
"memory": "cpp",
"memory_resource": "cpp",
"optional": "cpp",
"string": "cpp",
"string_view": "cpp",
"system_error": "cpp",
"tuple": "cpp",
"type_traits": "cpp",
"utility": "cpp",
"fstream": "cpp",
"initializer_list": "cpp",
"iosfwd": "cpp",
"istream": "cpp",
"limits": "cpp",
"new": "cpp",
"sstream": "cpp",
"stdexcept": "cpp",
"streambuf": "cpp",
"typeinfo": "cpp",
"chrono": "cpp",
"thread": "cpp",
"winsock2.h": "c",
"ws2tcpip.h": "c",
"windows.h": "c",
"stdio.h": "c",
"ctime": "cpp",
"iomanip": "cpp"
} // 效果效果比cpptools要好
}// tasks.json
{
"version": "2.0.0",
"command": "clang++", // 要使用的编译器
"args": [ // 编译命令参数
"${file}", //要编译的文件名,你也可以改成 *.cpp 表示编译当前目录所有的cpp文件
"-o", //指定生成的程序名字
"${file}.exe", //这是你要生成的程序名字
"-Wall", // 开启额外警告
"-g", // 生成和调试有关的信息
"-static-libgcc", // 静态链接
"-fcolor-diagnostics", //彩色信息
"-w", //屏蔽警告
"--target=x86_64-w64-mingw", // 默认target为msvc,不加这一条就会找不到头文件
//以下都是链接库参数,需要链接什么库就加在这
"-lws2_32",
"-lIphlpapi",
"-lgdi32"
],
"tasks": [
{
"label": "clang++", // 任务名称,与launch.json的preLaunchTask相对应
"type": "shell",
"group": {
"kind": "build",
"isDefault": true // 设为false可做到一个tasks.json配置多个编译指令,需要自己修改本文件,我这里不多提
},
"presentation": {
"echo": true,
"reveal": "always", // 在“终端”中显示编译信息的策略,可以为always,silent,never。具体参见VSC的文档
"focus": false, // 设为true后可以使执行task时焦点聚集在终端,但对编译c和c++来说,设为true没有意义
"panel": "shared" // 不同的文件的编译信息共享一个终端面板
}
}
],
"problemMatcher": {
"owner": "c",
"fileLocation": [
"relative",
"${workspaceRoot}"
],
"pattern": {
"regexp": "^(.*):(\\d+):(\\d+):\\s+(warning|error):\\s+(.*)$",
"file": 1,
"line": 2,
"column": 3,
"severity": 4,
"message": 5
}
}
}到最后一步了,安装vscode插件(必要和好用的都给你整上)
直接在扩展里面搜以下名字,然后安装第一个就行,都是完整名字,非模糊搜索
Bracket Pair Colorizer -> 彩虹括号
C/C++ -> 必备
C/C++ Clang Command Adapter -> 必备
Chinese (Simplified) Language Pack for Visual Studio Code -> 简体中文
Code Runner -> 必备,右上角有一个运行按钮
Include Autocomplete -> 必备,头文件自动补全
One Dark Pro -> 好看的主题 
Settings Sync -> 配置文件云同步
TabOut -> 按tab跳出括号或引号,很方便
vscode-icons -> 好看的图标
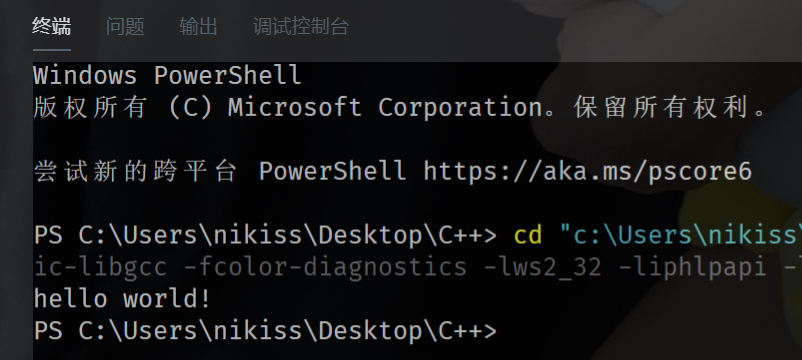
写一个hello world测试一下
#include
using namespace std;

int main()
{
    printf("hello world!\n");
    return 0;
} 
最后,教一下如何修改vscode背景图,如果是默认安装路径,那就跟着下面这个路径打开workbench.desktop.main.css这个文件
C:\Program Files\Microsoft VS Code\resources\app\out\vs\workbench\workbench.desktop.main.css
打开后不要慌,ctrl+f搜索body{,不出意外的话是第5个


用下面这断代码替换掉上面选中的部分,代码末尾的路径就是背景图路径
body{margin:0;padding:0;overflow:hidden;font-size:11px;user-select:none;-webkit-user-select:none;opacity: 0.86;background-position: center;background-repeat: no-repeat;background-size: cover;background-image: url("file:///C:/1.jpg")}opacity的值就是透明度,自己调。保存重新打开vscode就可以看到效果了,会有提示文件已损坏,忽略就行。
每次vscode更新后,这个文件会重置,所以建议保存好自己设置好的代码,方便更新后直接替换。
新版新增: 在设置里面加上这个设置
"update.enableWindowsBackgroundUpdates": true